
7 Tips for Managing Open Fire Heat for Better Camp Cooking

Table of Contents
- Start With a Fire Built for Cooking, Not Just Watching
- Campfire Cooking Temperature Control: Reading the Fire Before You Cook
- Cooking Over Hot Coals Beats Cooking Over Flames
- Campfire Cooking Grate Height: The Simplest Heat Dial You Have
- Dutch Oven Cooking Over a Campfire: Managing Heat From All Sides
- Stoking, Fuel, and Wood Moisture: Keeping Heat Steady
- Fire Safety, Smoke, and When to Stop Cooking
- Conclusion
- Frequently Asked Questions
Last Updated: October 21, 2026
Start With a Fire Built for Cooking, Not Just Watching
Most campfire problems start before the food hits the grate. A fire built for looks gives you nothing to cook on.
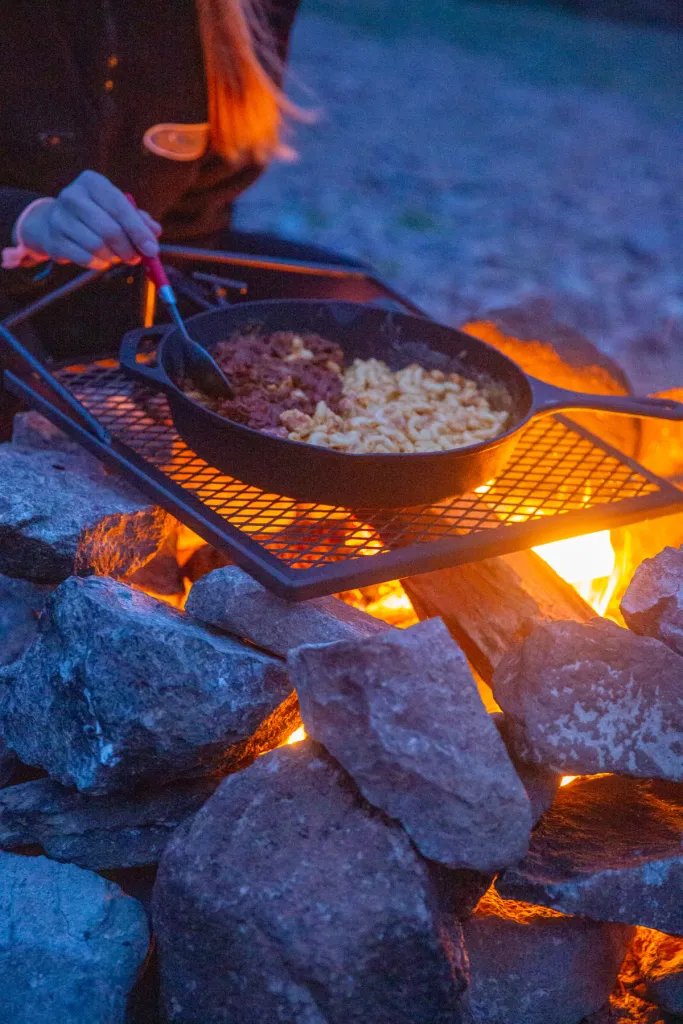
We've been building campfire cooking gear since 1994, and the lesson holds every trip: control the fuel, control the heat.
Build a smaller fire than you think you need. Let it burn down. Cook over the coals. Then feed it small amounts of wood to hold the temperature steady.
A few basics first, because the words matter:
- Coals (embers): the glowing chunks left after flames die down. This is your cooking heat.
- Flames: the visible fire. Good for boiling and looks, bad for searing meat evenly.
- Coal bed: the spread-out layer of coals under your grate. Your real "burner."
Campfire Cooking Temperature Control: Reading the Fire Before You Cook
Campfire cooking temperature control starts with your hand, not a thermometer. Hold your open palm about 6 inches above the coal bed and count the seconds until it feels too hot. Match the count to your cooking job.
| Hold Time at 6 Inches | Heat Level | Best For |
|---|---|---|
| 2-3 seconds | High | Searing steaks, boiling water |
| 4-5 seconds | Medium-high | Burgers, sausages, foil packets |
| 6-7 seconds | Medium | Chicken, vegetables, fish |
| 8+ seconds | Low | Keeping food warm, slow cooking |
The Hand Test and Coal Bed Check
The hand test tells you heat. The coal bed check tells you coverage. An even bed about as wide as your grate gives steady heat; a lopsided pile gives one hot corner and one dead corner. If half the bed is dark, rake coals from the hot side to the cold side, wait a couple of minutes, and test again.
Cooking Over Hot Coals Beats Cooking Over Flames
Cooking over hot coals gives you steady, even heat. Cooking over flames gives you smoke, soot, and scorched outsides with raw centers. This is the single biggest fix most camp cooks need. Flames flare when fat drips; coals radiate heat evenly and hold it.
Building and Shaping Your Coal Bed
Start with a compact fire of small-to-medium split wood. Let it burn until the logs break down into glowing chunks, usually 20 to 30 minutes. Then shape the bed:
- Spread it wide for a large grate or a big batch of food.
- Bank it to one side to create a hot zone and a warm zone.
- Pile it deeper for high heat when you need a hard sear.
Keep a small pile of extra coals raked off to the side. When the bed cools, add a few and rake them in.
Campfire Cooking Grate Height: The Simplest Heat Dial You Have
Campfire cooking grate height is the easiest heat control you'll ever use. Move the grate up to cool the cook, down to sear.
Set the grate high, about 8 to 10 inches above the coals, when you start cooking.
Our AdjustaGrill Stake Grill was built around this idea. The support bar lets the grate slide up and down level, so you control heat without tilting the food.
Dutch Oven Cooking Over a Campfire: Managing Heat From All Sides
Dutch oven cooking over a campfire is all about balance. You need heat from the top and the bottom, or you'll burn the bottom before the middle is done.
The trick most people miss: coals go on the lid, not just under the pot.
Top Heat, Bottom Heat, and the 2/3 Rule
A simple rule we use is the 2/3 rule:
- Bottom heat: about two-thirds of your total coals go under the oven.
- Top heat: about one-third goes on the lid.
For a baking job like biscuits or a cobbler, shift toward more top heat. For a simmer or stew, keep it mostly on the bottom.
A few more Dutch oven habits that pay off:
- Rotate the oven a quarter turn every 15 minutes, and the lid a quarter turn the other way. This evens out hot spots.
- Check the coals every 20 minutes and replace the ones that have gone gray.
- Lift the lid away from you so ash doesn't fall in.
Stoking, Fuel, and Wood Moisture: Keeping Heat Steady
Steady heat comes from steady fuel: small, dry wood added often, not big wet logs added rarely. Most camp cooks blame their grate or coals when the real problem is the wood.
Dry, seasoned wood lights easily and burns hot with little smoke. Green or damp wood hisses, smokes, and steals heat to dry itself out before it gives heat back.
How to Judge Wood Moisture Without a Meter
A moisture meter is handy at home, but at camp you use your senses. Seasoned firewood is typically about 15 to 20 percent moisture; green wood can be far higher. You don't need a number:
Adjust-A-Grill | Heavy Duty Patented Portable Campfire Grill Since 1994 →
- Look for cracks in the end grain. Seasoned wood splits and checks at the ends as it dries.
- Feel the weight. Dry wood feels light for its size. A same-size piece that feels heavy is holding water.
- Listen for a hollow knock when you tap two pieces together. A dull thud means damp.
Why Fuel Choice Drives Smoke and Creosote
Smoke is unburned fuel. Wet wood and smoldering fires make a lot of it, and that smoke carries creosote, the sticky, tar-like residue that builds up in chimneys and flues.
The fix is the same every time: dry fuel, a hot coal bed, and enough air. If smoke is chasing you around the fire, open up the draft, add a little dry kindling, and let the fire come back to a clean burn before you cook.
Drying Fuel at Camp
You can't season wood at camp, but you can keep what you have dry and coax damp pieces along:
- Keep your wood under cover. A tarp or the bed of a truck keeps rain and dew off. Stack it off the ground on a couple of split logs.
- Bring a little dry kindling from home so you aren't trying to light damp wood with damp wood.
- Warm damp pieces near the fire, not in it. Stand them on end a few feet back so the heat drives off surface moisture before they go on the coals.
- Split bigger pieces. A split face dries and catches faster than a round, and smaller splits give you finer control.
Stoking for Steady Heat
Feed the fire small split pieces every 10 to 15 minutes rather than one big log.
Add a piece or two while the coals are still bright, not after they go gray.
We also sell a Collapsible Charcoal Chimney if you want to start coals fast without lighter fluid. It gets you to a hot coal bed quicker and cleaner.
Fire Safety, Smoke, and When to Stop Cooking
Fire safety around an open fire comes down to three things: a clear zone, a contained fire, and eyes on it at all times.
A contained fire is easier to manage and easier to leave clean. Where fires are permitted, a fire pan keeps coals off the soil and catches the ash.
Rules change, so check current requirements before you head out.
Warning Signs to Stop Cooking and Fix the Fire
Most fire problems announce themselves before they get serious. Treat these as a checklist:
- Smoke in your face no matter where you stand. The fire is starved for air or the fuel is wet. Open the draft, add dry kindling, and let it come back to a clean burn.
- Flames flaring every time fat drips. The grate is too low or the coal bed is too hot. Raise the grate a few inches and give it a minute.
- Sparks throwing with the wind. Stop cooking. Wind-driven sparks are how fires escape. Let the fire burn down and drown it.
- Coals spilling outside the pan or ring. Rake them back in with a shovel. A coal on the ground can start a ground fire.
How to Tell a Fire Is Really Out
A fire that looks out can hold heat for hours. Drown it with water, stir the ashes with a shovel, and drown it again. Then feel it with the back of your hand a few inches above the ash.
Don't bury a fire and walk away. Buried coals can smolder a long time and come back when the wind picks up.
Smoke Control and Air Quality
Smoke control is simple too. Dry wood and a hot coal bed give you little smoke; wet wood and smoldering fires give you a lot. If smoke is chasing you around the fire, fix the fuel and the draft before you blame the wind.
Conclusion
Managing open fire heat is really about three habits: build a coal bed, read it with your hand, and move your grate or your coals to match the job.
Our AdjustaGrill Stake Grill was made for exactly this kind of cooking. It slides level to change height, swings away from the fire so you never burn your hands, and handles Dutch ovens and cast iron.
Get your fire right, keep your coal bed steady, and the food takes care of itself. Happy Campers!
Frequently Asked Questions
How do you control heat when cooking over an open fire?
Control comes from three things: fuel, distance, and timing. Build a coal bed instead of feeding big flames, then change the distance between food and coals to dial heat up or down. An adjustable grate makes this easy because you can raise it to cool things off or lower it to sear. Let the fire burn down 20 to 30 minutes before cooking so you have steady embers rather than flare-ups. Add small pieces of wood one at a time to keep heat consistent instead of dumping on a big log.
How far should a campfire cooking grate be from the fire?
Start about 6 to 8 inches above the coal bed for most cooking, then adjust from there. Thin foods like fish and vegetables do better higher up, around 8 to 10 inches, while steaks and burgers can sit closer at 4 to 6 inches for a sear. The right campfire cooking grate height depends on how hot your coals are, so treat these as starting points. If food is browning too fast, raise the grate. If nothing is happening after a few minutes, lower it.
Should you cook over flames or hot coals?
Cook over hot coals, not open flames. Flames are uneven and deposit soot on your food, and they flare up whenever fat drips. Coals give you steady, radiant heat you can read and adjust. Let your fire burn down until the logs are coated in gray ash and glowing orange underneath. That coal bed is your cooking surface. Keep a small hot fire going off to the side so you can rake fresh coals under the grate as needed to hold temperature.
How do you manage heat for Dutch oven cooking over a campfire?
Use heat from both the top and bottom. A common approach is roughly two parts coals on the lid to one part underneath for baking, and closer to even for simmering. Rotate the oven a quarter turn every 15 minutes and rotate the lid the opposite direction to avoid hot spots. Keep the coal count consistent by replacing spent coals as they cool. A lid lifter and a heat-resistant glove make this safer. Check your food early the first time you try a new setup.
Leave a comment